A special shoutout goes to A1 VYZ, who had no idea I was recording that particular QM. An admirable opponent indeed.
The basic idea is to control the board, and control it hard. You probably won't be doing much until turn five or so, with the exception of Blood Frenzy. Fans of Achilles Lance will find a similar approach here. Buy the board t5, keep your opponent off the board after and poke whenever you get the chance. Only you have haste every turn, Rothem can be used almost like a sweeper in tandem with a JD and some hasty beats, and if you take full board control without needing Rothem's ability, go ahead and win the game in one turn.
To be perfectly honest, I've found that most games won't come to that point. Usually, as soon as I stick more than one ally, my opponent will outright concede. People don't like Rothem, and frankly, I don't blame them. My list is a bit less overkill and a bit more consistent (in my opinion), but the premise is the same. You essentially give up on using shadow energy, but if you can control the board without it, you win before the opponent mounts a counteroffensive regardless the actual size of your allies.
I highly recommend this deck if you're new to the Shattered Fates scene and aren't too confident in your own abilities. There's some tough, intricate decisions and you're pretty much guaranteed to make mistakes, but a list like this one is also pretty forgiving because it's really good at recovery. Use it just to test the waters and see what other people are playing until you can aquire a better grasp of the new meta.
Then, keep playing Rothem anyways, because he's just that kingly.
Hero (1):
- 1 Rothem, King of Layar
Allies (17):

- 3 Frostmare
- 4 Rampant Krygon
- 2 Slingblade Demon
- 2 Yari Marksman
- 2 Braxnorian Veteran
- 4 Wild Berserker
Abilities (14):
- 4 Crippling Blow
- 2 Sacrificial Lamb
- 4 Blood Frenzy
- 2 Smashing Blow
- 1 Enrage
- 1 Spiked Bolas Strike
Items (8):
- 2 War Banner
- 4 Jeweler's Dream
- 2 The King's Pride
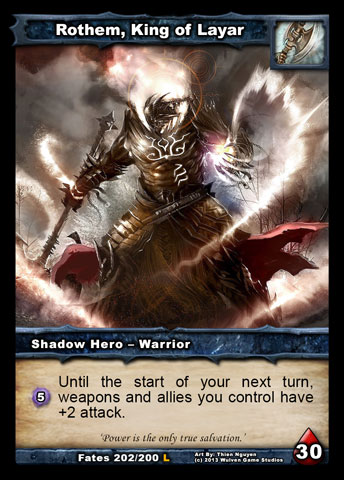 Rothem: My general rule is to save his ability for when you really need it, unless you already have 9 or 10 SE. Having 4SE minimum forces the opponent to play cautiously on their turns, because they have no idea how much damage you could hit them for. It doesn't matter if that number is really zero. The threat of a threat is all that matters.
Plus, there is a chance you just topdeck a Frostmare and a Slingblade for the win.
War Banner: Hasty beats aren't good if they can't kill things. Wild Berserker needs that +1 to kill most things, and this is where he gets it. Banner is also good because very few decks are packing ways to destroy it. There are so many convoluted strategies running amok that people don't have space in their decks for disruption, and even if they did, a typical control deck wouldn't be able to hard counter each of the widely varied decks derping around at the moment.
Smashing Blow: Very useful for the mirror, but also Amber, Victor, Serena, Lance, that new priest, and pretty much everyone except Piraxis and Aramia. Since your allies are squishy, attacking into opposing weapons, especially Soul Seeker, could spell the game for you. This keeps that from happening.
Enrage: It's Enrage. You're a very slowplay deck who sometimes needs the extra turn or three this card provides.
Crippling Blow: I shouldn't have to explain this card. You HAVE played Shadow Era before, right? Every reason this is awesome in Amber is why it's awesome here.
Blood Frenzy: Phyrexian Arena is good, especially when you have 40 health. Play it. You can't do anything cool with it, but it'll win you more games than you could ever possibly imagine.
Sacrificial Lamb: Even if you do have BF, it's not always enough. You don't have any unique allies besides the slingblade, but you do have a lot of hasty beats that will never survive a turn. Save your opponent the trouble and draw some cards. Lamb is also amazing with Slingblade Demon and Rothem in general, another enabler that lets you dig to get the most out of a 5SE turn. Killing your own dudes is also a plus for Wild Berserker and Frostmare.
 The King's Pride: The damage boost is like having two Rothems instead of one. The extra ten life if attacked down is nothing to scoff at, either, and the point of health gives your allies an increased boiling point
so it's harder to melt their faces in. An all around amazing card, but perfect for this deck. The alternative, Rothem's Visage, is absolutely pointless. Not only is the SE cost ridiculously crippling, but all your allies already have haste anyways.
Jeweler's Dream: A lot of cards in this list like to be played alongside other cards, especially Slingblade Demon and Braxnorian Veteran. You really don't need to be playing lots of dudes and removal at the same time, as in here they're one and the same, but you DO need to be playing allies without missing your Blood Frenzy, War Banner, and King's Pride drops. This card will help you get there. It's not as amazing as it is in Amber, but if you have one of these puppies out when you pop your ultimate, the more, the merrier.
Braxnorian Veteran: You play five removal attachments and five hero attachments. One in every four cards in your deck. Jericho and Piraxis will try to collect em all. Don't let them.
Veteran is also useful because it lets you spend an early cripple to save damage and then, when your Krygon isn't enough to kill an Armored Sandworm, just attack the first guy you crippled instead, then drop the veteran and reattach to whatever you need to reattach to.
Wild Berserker: This card is amazing on so many levels. The thing is that you need to know how to play him, which is your opponent has to have at least one ally more than you BEFORE you attack with him. Sometimes, to play Jeweler's Dream things in the correct order, you might have to attack targets you wouldn't otherwise.There are some tricks with Sac Lamb and Slingblade as well. All in all, Wild Berserker is hugely rewarding, but will likely be the biggest reason why you make play mistakes with Rothem.
Also note that in the game client, there's no visual indicator of the two attack boost. It just happens as damage resolves. Combat math is an easy thing to get wrong, too.
Frostmare: I play three of these and not four because firstly it's a 1/2 and secondly it only helps if you're in a position to win the game. I want to have some slots left over to get yourself into that position and also to keep it that way. As long as you control the board, winning is rarely a time-sensitive matter like combo Rothem would have you believe.

Slingblade Demon: Sort of like an extra set of hasty dudes, these guys are champions whether or not you've paid your 5SE that turn. They're great with all your hasty guys, but also make probably the best sac lamb targets in the game, aside from Dur'Kan or Shadow Knight.
Yari Marksman: I have two of these, but I also used to play more removal attachments. I may cut this guy down to a singleton. Straight-up remova
l in Shadow Era is rare, conditional though this card may be. Good when it's good, but you don't always want to draw one.
Spiked Bolas Strike: I once played three of these, but I replaced them with different disruption to cover a wider range of cards (smashing blow). I like this card, but it's also pretty expensive and doesn't always neutralize the threat fully.
Boweh out.
No comments:
Post a Comment